Hi Crafty Friends,
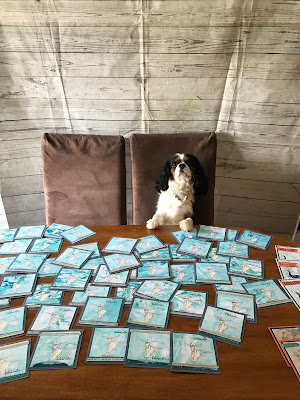
I've been busy the past few days getting all my swaps done for Onstage in Sydney. This time next week we will be getting to meet some old friends and make lots more new ones. I attended my first ever onstage event last November when Stampin' Up! had their live event in Brisbane. All I can say is, it was Awesome!! I am well and truly hooked. So now I'm getting prepared for the new catalogue reveal as well as seeing the great new products first hand.
This event, I decided to feature the marbling technique. This is such a fun and easy technique, You only need, shaving foam, reinkers and card stock. Each card will turn out a little differently to the one before and it is heaps of fun to do.
If you are at onstage next weekend, please come and say hi!
Unfortunately, I won't have my gorgeous little helper with me.
Tanya de Roy - Independent Stampin' Up demonstrator - paper craft - cards - minialbums - off the page -
Thursday, 30 March 2017
Monday, 20 March 2017
Hidden Reveal Spinner Class
Hi Crafty Friends,
Today I've been having a bit of a play with the emboss resist technique. Sara Douglass, CEO of Stampin' Up! recently posted a video that sparked again this awesome technique that is so easy to achieve. This Saturday, I am having a class where we will make the Hidden Reveal Spinner Card and also an Emboss Resist Card.
Places are limited, so please contact me if you would like to come along and join in the fun.
On another note, I can't believe there is only just over a week of Sale A Bration Left......Make sure you place your order today as when Sale A Bration is over, the products are gone for good.
Well, I'm off to create some more. It's been raining continuously here and looks like it will be all week so it's perfect to stay home and craft.
Until next time,
Stay Crafty,
XO Tan
Sunday, 19 March 2017
Made With Love
Hi Crafty Friends,
Today was another Made With Love markets for the northern NSW area. After an incredibly wet couple of days, we managed to get everything set up and have a great day. We met an amazing group of people who like us, share the passion for paper craft.
Again, I was lucky enough to have my best friend and total paper addict with me as well as my gorgeous daughter. She was so excited to show off her new, Ink Responsibly T-Shirt and definitely looked the part. For the first time, I booked an extra space for the markets, and just as well, I have been busy......Very busy!
How has your weekend been? Crafty? What ever you have been doing, I hope that you all are having a fabulous weekend shared with those you love. (or at the very least, doing what you love)
Next weekend, we will be having our first class with the hidden reveal spinner card. If you are in the area, please let me know if you would like to come and join us. It will be a great day and lots of beautiful crafters.
Until next time,
Stay Crafty,
XO Tan
Tuesday, 7 March 2017
Global Design Project Colour Challenge 077
Hi Crafty Friends,
Today I've decided to take part in my very first colour challenge with the Global Design Project. For this week's challenge, we were given a set of colours and I set off to make a card. The colours are Early Espresso, Peekaboo Peach, Bermuda Bay and a free choice, I chose Watermelon Wonder.
I began my card with my chosen colour of Watermelon Wonder and added a matt of Early espresso embossed with the petal burst TIEF. Before I embossed, I brayered Craft white ink directly onto the folder to really bring out the texture and to give me more versatility with the colours.
I decided to pull out one of my favourite stamp sets, Botanical Blooms. With all the gorgeous new stamp sets at the moment from the Occasions and Sale-A-Bration catalogues, It's easy to forget about all the other amazing stamps in the Annual Catalogue.
I die cut a series of flower blooms using the above colours with the Botanical Builder Framelits. I have highlighted the flowers using my uni ball Gell pen. This is a favourite technique of mine for bringing a cut image to life.
Finally, I've embellished my flowers with some Enamel Accents in Peekaboo Peach and the co-ordinating Peekaboo Peach Ruched Ribbon. The sentiment is a simple Happy Birthday from the Sale-A-Bration set, Designer Tee. I love the whimsical font of this stamp.
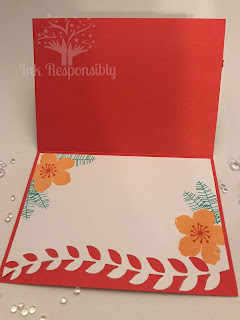
Inside the card, I've continued the theme with stamped florals from the set in the colours of the challenge, finished with a die cut border from the framelits.
Product List
So, what do you think? This was a fun card to make and I absolutely love these colours. The contrast between the colours is just beautiful. I will definitely be going back to this colour scheme again.
Thank you for visiting me today. Until next time,
Stay Crafty,
XO Tan
Saturday, 4 March 2017
ESAD 2017 Last Chance Sale-A-Bration Blog Hop
Hi Crafty Friends,
Welcome everyone to my blog. You may have come from Megan Lenske or you may be starting here. I hope that you find lots of inspiration along the way. I can't believe the Occasions catalogue is nearly at an end. I have loved all the amazing products that are in it that it's too difficult to pick just one. Here are some of my favourites.
Here I've used the cute little bee die from the Detailed Dragonfly Thinlits and inlaid them in a repeating pattern across the card. I have gone with a a muted colour scheme of Tip Top Taupe, Sweet Sugarplum, & Pool Party. This was a little fiddly however, the end result is gorgeous. I have finished off the card with an embossed banner cut with the Triple Banner Punch and embossed using the Hexagons Dynamic TIEF. To finish, I've cut a circle with our Stitched Framelits and Heat embossed in Whisper White. Another favoroute product is the metallic ribbon pack from Sale-a-Bration. I just love it. It is so soft and drapes beautifully yet can easily make a fork bow.
tams# 12061
Product List
Links by TheseAreMyStamps.com
While I had the Detailed Dragonfly Thinlits out, I made this card. I have simply blended Bermuda Bay and Island Indigo ink with a sponge and flicked water onto the card and absorbed it to give the splatter effect. From there, I have cut the dragonfly cluster and replaced the panel with a white one. The card is matted on a Silver Foil card stock panel and onto a Bermuda Bay card base. I have used the dragonfly cluster I removed from the front panel and placed it inside my card as a feature.
For my final project, I used the Magic Reveal Slider Card technique and incorporated it into a scrapbook page. I am hopelessly in love with the Everyday Hero stamp set and knew that it would work well in a scrapbook page.
I started with a 12" x 12" Daffodil Delight base and inserted the Magic Reveal Spinner Card technique the same as I would with a card. To make the large circle, I simply traced around a small plate and cut it out. All the shapes were fussy cut, which is surprisingly simple with this stamp set. I've added white highlights with my Signo Uni-Ball white Gell pen on all the buildings and the title. My little girl Isabella is my Hero Everyday......
Product List
Links by TheseAreMyStamps.com
I hope you like what I have made and that it has inspired you. Please continue on the journey and check out what all the other amazing crafters have created. Next up is Leonie Schroder.
Blog Hop Participants
9. Kim Oliver
10. Kelly Kent
16. Narelle Fasulo
18. Maree McIntosh
19. Barbara Williams
Subscribe to:
Posts (Atom)