Monday, 7 May 2018

Birthdays, Fun Folds, & Alcohol!

Hi Crafty Friends,

Well, It's a new week and new cards.  My bestie had her birthday on the weekend and I made a special card because she's such a special lady.  She loves asian themes so I decided to make her a lantern card using the Artistically Asian stamp set and the Petal Palette suite.

This is a fun card and very easy to make.  I will have the tutorial available soon.  I have to wait till she gets her card, haha.  I am going to extend the card by adding a candle light in the centre for when it's on display.


For today's social group, we had lots of fun playing with an old colouring technique.  It's called the polished stone technique.  There are lots of videos available online, however, there are a few key points that are needed to get a consistent result each and every time.


  • Make sure you saturate the cotton ball with rubbing alcohol.
  • Use light colours so that you can stamp on your background.
  • Use no more than 3 colours.
  • Apply the colour by dabbing lightly onto the glossy cardstock.
  • Add a sparkle to your background by adding Wink of Stella to the cotton ball.
  • Make sure your background is fully dry before stamping.
We all had a great time working out colour combinations and we all had a favourite.  This is my favourite and I used the Bright Wishes stamp set and sentiment from the Butterfly Basics.  Butterfly Basics is retiring soon and this has been one of my all time favourite stamps.  There are so many stamps retiring this year that it's hard to name just one.  

I'm hoping that my pre-order arrives tomorrow so I can play.  Yay! New toys.  My order of catalogues arrived today as well as special treats for my catalogue launch party.   If you live in Australia and don't have a demonstrator, I would love to send you a catalogue.  Just send me an email and I will get back to you asap.  

Till next time,
Stay Crafty.
XO


Wednesday, 25 April 2018

Wiper Card

Hi Crafty Friends,
Wow! 2 Blog entries in 2 weeks.  I'm beginning to make a habit of this, haha. I have been busy though.  I have recorded and uploaded my tutorial for how I made my wiper card.  I can't believe how supportive everyone has been.  I can't express enough how much I appreciate everyone's support.  This is quite a long tutorial so I've decided to cut out the colouring aspect and put that onto a seperate tutorial.  I am by no means any kind of an expert when it comes to colouring.  I just do what I love and if I am able to help others, then that makes me happy. 


I have also decided to share with you all my new storage system that I have put into place ready for the new Stampin' Up! year.  I knew I needed an overhaul when I prepped my area and found that I wasn't able to part with many (if any) die sets.  We currently get our dies packaged in super tough plastic envelopes that are made by Sizzix.  While these are great, they do tear over repeated use and they take up 3 times the room as my new system does. 


I not only made these little pouches, but I also labeled the dies with the name of the die set, the number of dies it contains, the name of the stamp set/s that it co-ordinates with and the year & catalogue it was first released in.  This way I am able to find the stamp set that co-ordinates with in no time at all.  I can also check back with old catalogues and see what the ideas and trends were at the time. 
I have also used this style of storage system for all my non Stampin' Up! stamp and die sets as well. 

I use a DYMO labeller to create my labels and I'm loving it.  Please share you suggestions or ideas.  As hoarders, sorry, collectors, of crafting awesomeness, finding a storage solution is almost the holy grail.


Sunday, 22 April 2018

Out and About with Animal Outing

Hi Crafty Friends,

I hope everyone has had a great week.  Some days are better than others but thats what great friends and craft are for.  Earlier this month I went to Onstage in Sydney to celebrate our craft nerd fest! Soooo much fun. One of the free stamp sets that we received was the super cute, Animal


Outing.  I adore this stamp set.  Its not often that us Aussies get a stamp that perfectly displays 2 of our iconic animals, the Kangaroo and the Koala.  On Saturday, I spent the day with my bestie at her place as she is a golf widow every Saturday.  I made my first ever Impossible card.  I made this one for a special friend who celebrated a birthday during the week.  I wont name any names, but she will receive a surprise when she gets it. 

Today my bestie came to my place and I made another first.  This one is a wiper card again made with the Animal Outing stamp set.  As I coloured my animals, I decided to raise up certain parts on dimensionals to create extra depth.  I will create tutorials for my projects during the week.  In the meantime, please check out my Bench Fold Card on Splitcoaststampers.  I was so excited to be a guest artist and am very humbled to be a part of this amazing world wide resource for crafters. 

Until next time,
Stay Crafty,
XO Tan

Wednesday, 21 March 2018

Barn Door Easter Treat Box

Hi Crafty Friends,

I'm back with a new tutorial for you.  One of the amazing US Stampin' Up! demonstrators, Debbie Henderson, created a cute box using the Sliding Door framelits.  This inspired me to create one suitable for both Letter or A4 sided cardstock.  You can find my complete video tutorial for this project Here.
Below are the measurements for the box.  C/S = Cardstock

C/S    8 1/4" x 8 1/2"
Scor on the 8 1/4" side at 1 3/4" & 6 1/2"
Scor on the 8 1/2" side at 1 3/4", 5 3/4", & 7 1/2"

C/S    5 3/4" x 5 3/4"
Scor at 1/2" on either side turn and scor at 1 3/4"


Insert for Easter treats

C/S    6 3/4" 3 1/4"
Scor at 3/4" on all four sides.
Die cut or punch opening as shown.

Stay Crafty,
XO Tan
Hi Crafty Friends,

Wow! It's been a while. I hope everyone is having a good start to the year.  I have been busy of late.  We finished the year with another litter of beautiful Cavalier King Charles Spaniel puppies and both Mum and all her babies are healthy and doing well.  That's it for puppies for a while.  Important for all our furkids to recover and be pampered for a couple of years before we go back down that road again.

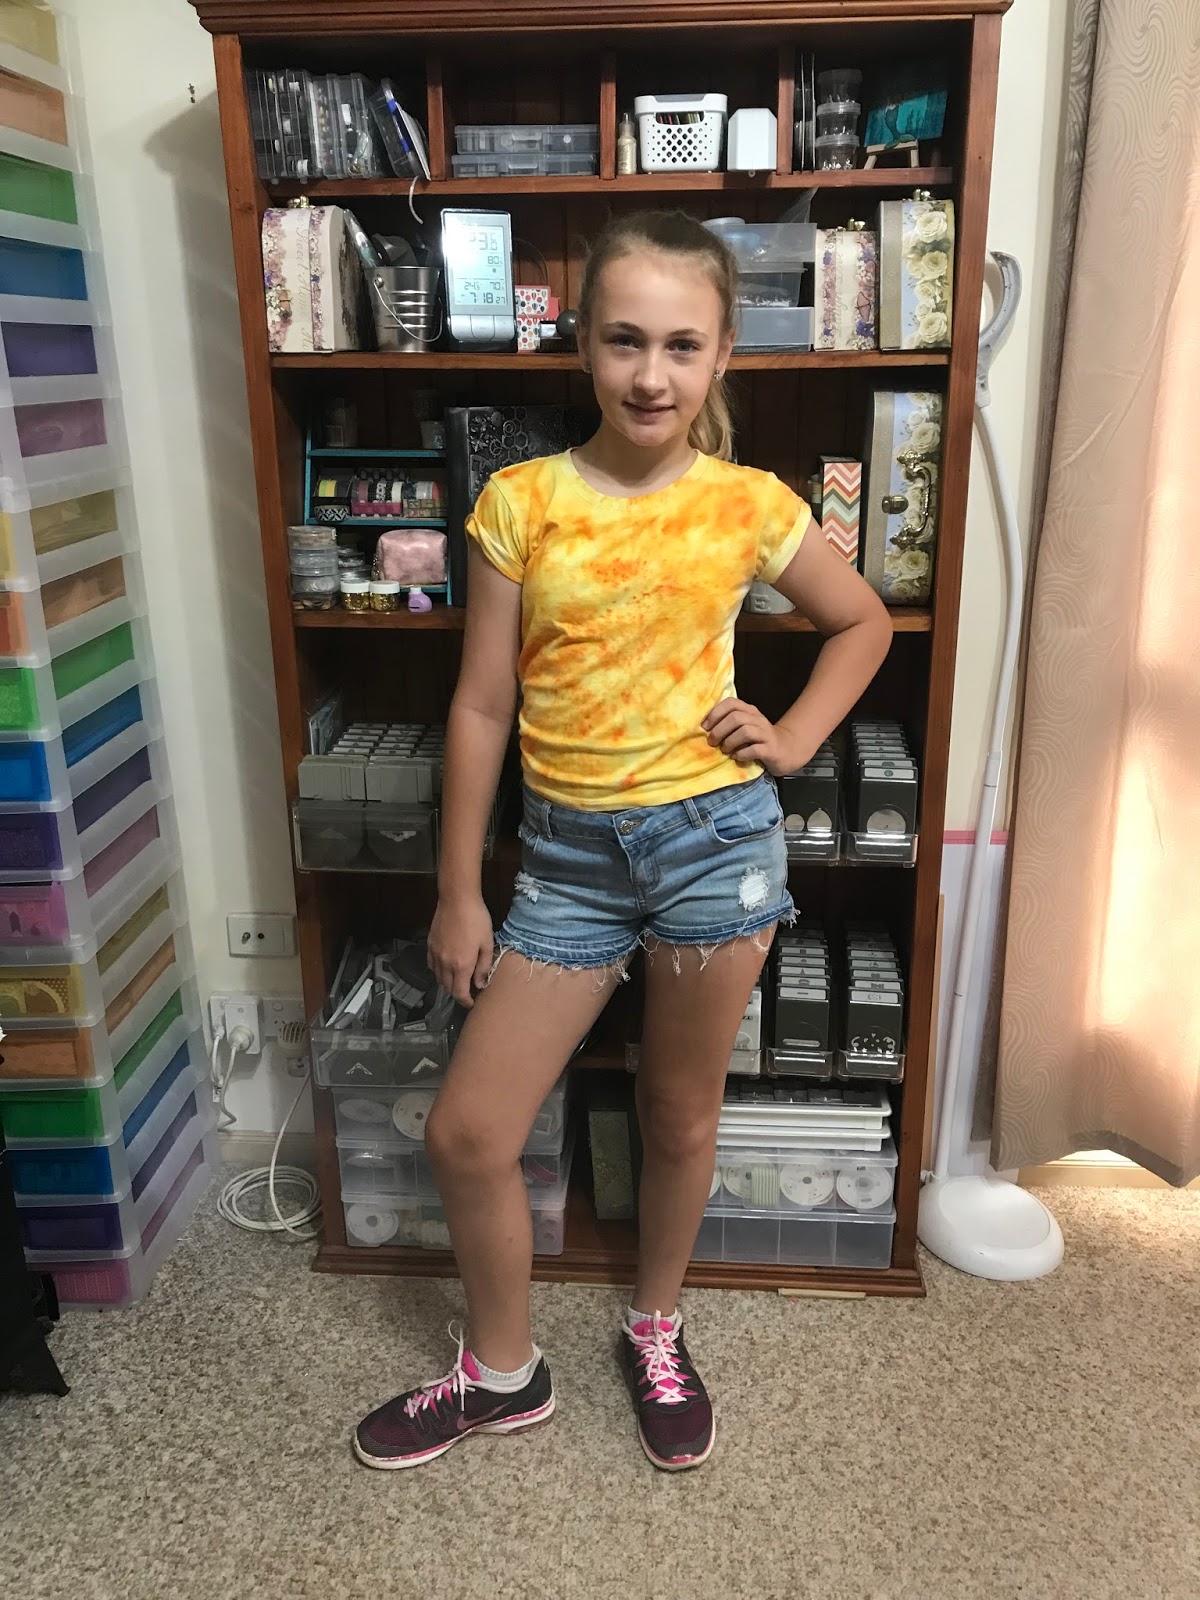
On the crafty side of things, I have been busy.  From making mini albums or boxes, I've been doing it all.  One of my absoloute favourite things to do is to watercolour with my inks.  I love how you can get total colour co-ordination by using the reinkers that match my SU! colours.  Well, now I've been having a ball with SU!'s new range of Brusho powdered pigments.  One would normally use these for colouring cards and other paper projects.  I found a new use for them.  Voilia, Watercoloured T Shirts....
Yesterday was Harmony Day here in Australia and I needed to come up with an orange shirt for my daughter.  She  absoloutely loved her new T-Shirt.  Because this is watercolour, I need to be careful it doesnt get wet, but it did get us through the day.  Now I'm going to try this with other fabrics that don't need to be washed, such as pencil cases or tote bags.  What would you watercolour?


One of the items I have been working on is this gorgeous Hexagon Box.  You can find the full tutorial for it here.
Initially I made it for my daughter (I test most of my projects on her) and loved it so much that I wanted to share it with you.


I hope that you are all well and having a great day.


Stay Crafty,
XO Tan

Thursday, 14 December 2017

Christmas Card Madness part 2

Hi Crafty Friends,
Well, you all asked for it so here it is.  I have finally created a tutorial on how I created my Staircase Stepper Card for Christmas 2017.  I have kept some of the basic embellishing in fast forward but if there is anything that you would like help with, please just ask.  I would love to see what you all come up with.  Today is the last day of school for my daughter this year.  She is an amazing crafter and I am so inspired by her creativity.  I'm really looking forward to spending the holidays creating and playing with her.  I don't often talk about my children because of their privacy online, however, each day I am reminded of all thats good in the world.  She is not only beautiful (yes, I'm biased) but such a dedicated student and is always happy to help me whenever I need it.

My fur babies are growing every day too. They are now eating and have just started running and playing with each other.  They look so funny when they run, just like fluffy little Teletubbies. Who remembers those?


Wednesday, 13 December 2017

Christmas Card Madness!

Hi Crafty Friends,

Today I finished off my Christmas cards for 2017 and I am in love with the gorgeous little Dachshunds from the bundle, Ready for Christmas.  I was inspired by a card that was made by Doris Pichler.  I changed min up a bit but you can view hers here. I wasn't able to give credit before as I couldn't find the original post.  These cards did take a while to make but I'm super happy with the result. I love a good 3D project and to be able to put this into a card is right up my alley.  What do you think? What's your favourite 3D project to make?


For this card I used the Ready for Christmas Bundle, At Home with You Bundle, as well as Hardwood background stamp and assorted inks and texture paste.  Classes have finished for the year, however, If you live in the Coffs Harbour region and would like to come along in the new year, just let me know. We are always happy to welcome new crafters to our group.


 Till next time,
Stay Crafty,
XO Tan


Friday, 8 December 2017

Camera Box with Mini Album

Hi Crafty friends,

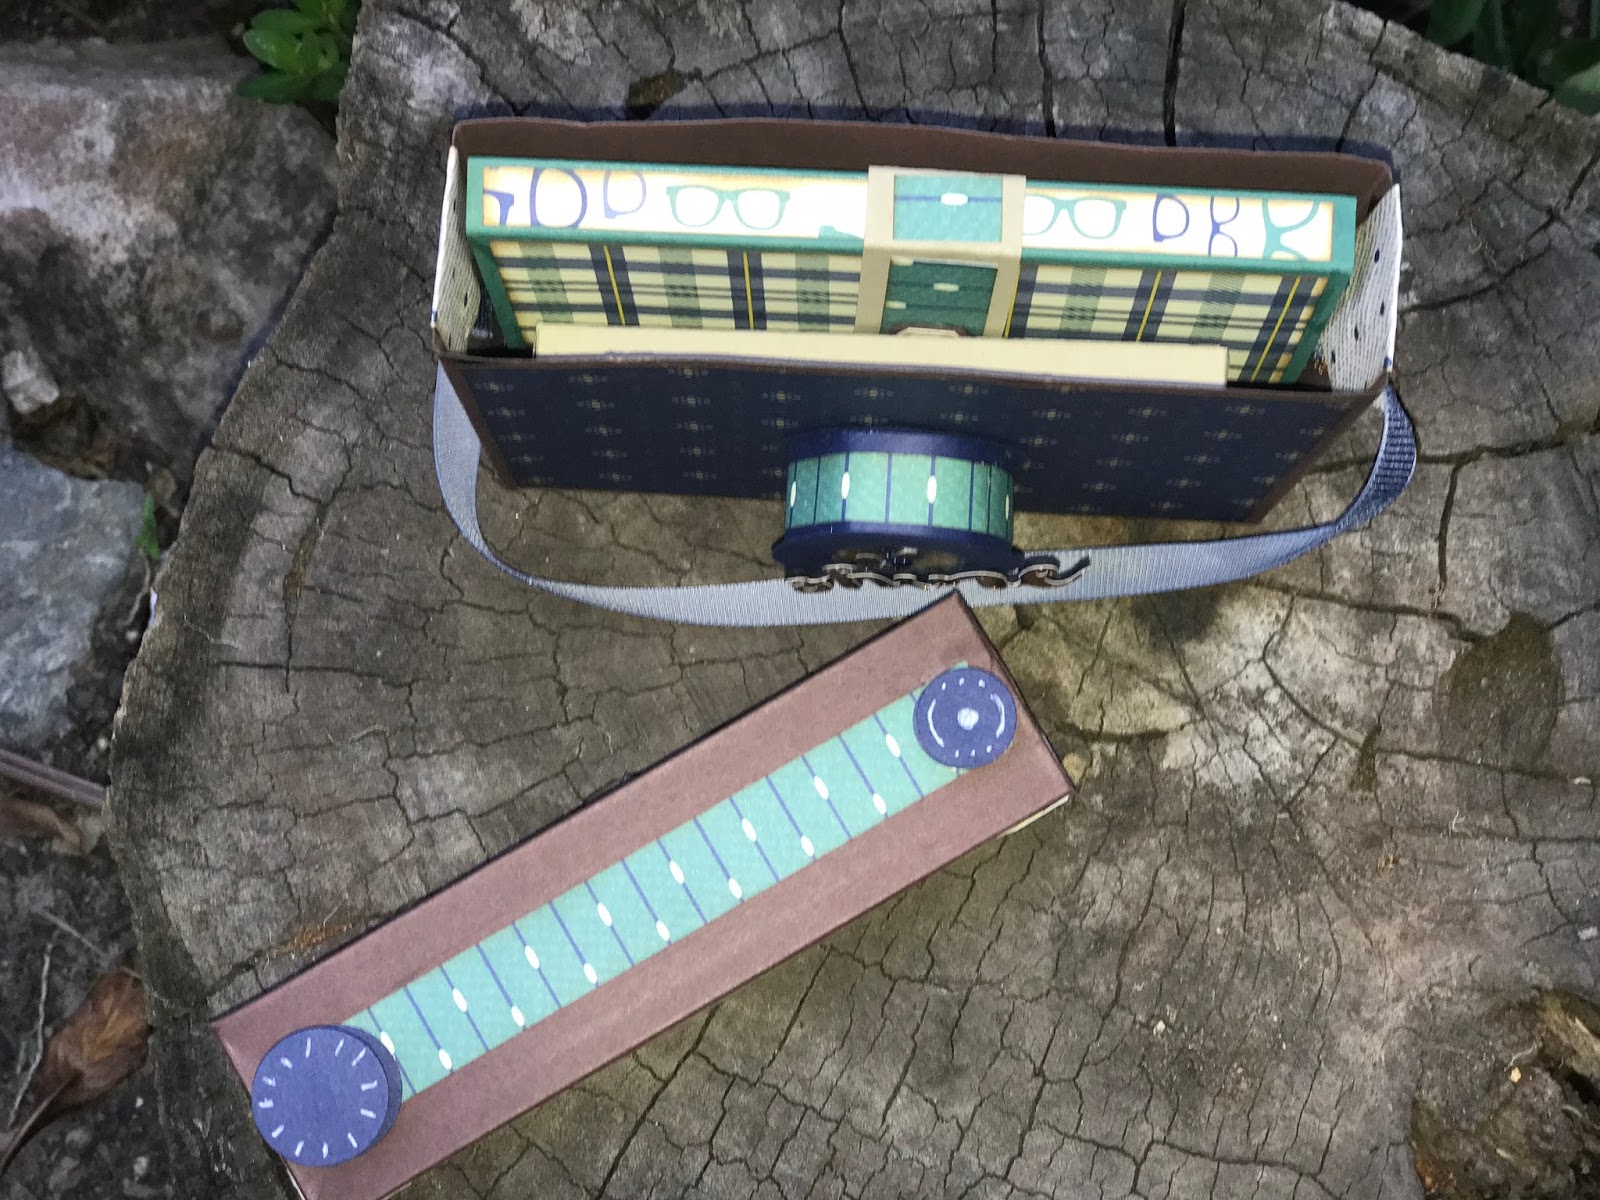
Today I'm sharing with you my latest project. Well, I actually came up with it for my daughter who just went on her first big camp away from home.  It's a super cute camera styled box complete with a shaker lens.  The lid of the box opens up to reveal a space to hold 2 mini albums including photos.  The albums will hold up to 20 photos each as well as other memorabilia.  Ive used the dashing new paper line from Stampin' Up! True Gentleman DSP.  The colours are so rich and the images are so cute.  I know that this paper is going to be a favourite of mine.  I hope you like this album and if you would like to make it as well, I have a tutorial and step by step video available for purchase.  Once you have purchased the tutorial, you will be emailed with the link.  As always, if ever there is a problem, just let me know and I will try to fix it asap.
What do you have planned for the week?  I'm planing a Christmas party for my lovely ladies and hosting a thank you event for them.  Crafty friends are really the best kind.


Till next time,
Stay Crafty,
XO Tan


Camera Box & Mini Album
br />

Here is daddy spending time with his babies for the first time.  Mummy is letting the babies see him. Too cute1


Wednesday, 6 December 2017

Tool Bench Fold Card

Hi Crafty Friends,

I have a brand new tutorial available for this stunning bench fold card.  This tool bench is a real stand out piece that is surprisingly simple to make.  I hope this is something that you will try yourself at home.  The card folds perfectly flat for mailing.
I hope that I have inspired you to make something like this.  Please share your designs.  I love the creativity of others and we should all inspire each other.

On another topic, My fur babies are growing so much each day.  They are now walking and have discovered there is a world outside their bed.  They are beginning to play with each other.  They are just too cute for words.  I know.....I know......I'm a crazy dog lady.....

Until next time,
Stay Crafty,
XO Tan


Suitcase Mini

Hi Crafty Friends,

Today I'm sharing with you a super cute little project.  It's what I call the Suitcase Mini.  The outside looks like a miniature suitcase, but when you open it up it reveals a accordion style mini album.  The finished size of this project is 4 3/4" x 4 1/2" x 1 1/4" excluding the handle.  This project can be completed within an hour. There are many occasions when this style gift would be great to give.  If someone is going away on a trip, leaving for college, moving out into a new home or just because.  You can view the complete tutorial here


.

Monday, 4 December 2017

Bike Ride Easel Card

Hi Crafty Friends,


Tomorrow we are celebrating a special friend's birthday.  I love my extended crafty family and always try to give them something that they will cherish.  This is the card that I made for her.  There is a tutorial for this available here.

Below are the steps for this card. I hope you like it and give it a go yourself.

My fur babies are growing so much every day.  They are now able to walk a little and are starting to want to venture the outside world.  I just love them so very much.  One look into those beautiful round eyes and I'm gone.  We will be adding to our Fur Family at the end of January.  My daughter is going to get her very own fur baby and we can't wait.

Until next time,
Stay crafty,
XO Tan


Ingredients:
Cardstock –
Whisper White  – 6 x 12 (15.3 x 30.5)
                                    5 ¾ x 5 ¾ (14.6 x 14.6)
                                    Plus scraps for stamping

Old Olive  -     5 ¾ x 5 ¾ (14.6 x 14.6)
Silver Foil  -    6 x 6 (15.3 x 15.3)

Inkpads –
Memento Tuxedo Black
Soft Sky
Old Olive
Sahara Sand
Soft Suede
Real Red
Smokey Slate
Dapper Denim
So Saffron
Calypso Coral


Stamp Sets & Dies –
Bike Ride S/S
Sheltering Tree S/S
Birthday Banners S/S
Bunch of Banners Framelits
Layering Ovals Framelits

All the other bits and pieces –
5” Mini Sequin Trim (Silver)
Mini Dimensionals
Stamp N Pierce Mat
Tombow
Sponges
Snips
Trimmer N Scoreboard
Bigshot
Copy Paper
Washi Tape


The Simple Steps –

1.     Score the 6” x 12” Whisper White piece at 6” & 9” on the long side.  Fold piece in half and the half again on one side.
2.     Take the 6” x 6” piece of W/W and secure to your work surface with a small amount of snail on the back.
3.     Tear the copy paper in a curve so that it looks like a hill.
4.     Secure the lower portion of the hill on the lower third with washi tape.
5.     Use a section of sponge and blend Soft Sky ink in a gentle swirling motion.
6.     Remove the lower section of copy paper and place the other piece over the top of the sky you just created.
7.     Repeat this process using Old Olive ink for the grassy area.
8.     Stamp grassy areas with the stamp from Sheltering Tree in Old Olive  randomly throughout the hill.
9.     Gently remove the inked panel and centre on the Silver Foil panel.
10. Place the largest Scallop oval die in the centre of the panel. Run through the Big Shot together.
11. Take only the inked panel and place the largest oval die and centre it over the previously cut scallop oval. Cut in the Big Shot.
12. Adhere the sponged piece to the foil piece.
13. Place sponged image on top of the folded easel piece.  Using a pencil, trace the aperture. Using the same scalloped oval that was used on the foil piece, cut out this folded piece.
14. Adhere the sponged piece to the cut easel piece using Fast Fuse.
15. Take the scrap pieces of Whisper White and stamp the bicycle parts using Memento Tuxedo Black.
16. Stamp the highlights for the bicycle using Soft Sky
17. Stamp the basket and dog using Sahara Sand
18. Stamp the apples and any other items you want to include in your card.
19. Put your bicycle together using Tombow Mono.  Adhere the bicycle using dimensionals in the centre of the card so that it rests just under the oval aperture.
20. Add the front and back baskets using extra dimensionals.
21. Stamp a banner from Birthday Banners using Dapper Denim Ink.
22. Stamp the ‘Happy Birthday’ greeting in Real Red, curving it as needed to fit within the banner. Attach with Dimensionals.
23. Adhere the Old Olive piece to the large open square of the easel piece using fast fuse.
24. Stamp a greeting onto the bottom half of the Old Olive piece.
25. Place some stamped and die cut flowers on either side of the stamped greeting.
26. Place 3 gems above the greeting to function as a stopper for the easel.


Enjoy!

Wednesday, 29 November 2017

Say Cheese!

Hi Crafty Friends,

Wow! I am so overwhelmed by the support I've had for my Advent Calendars.  I can't wait to see how everyones turns out.  These really come together quite quickly and are such a lovely addition at Christmas.  Tonight is the night when my children and I fill our calendars and really start the Christmas excitement.


I have been busy creating again.  When my daughter went on her year 5 camp to the snow this year, I wanted to give her a special album.  I came up with a box that looks like a camera but on the inside, there is a mini album.  I wanted to keep things simple and this is her special place for her favourite photos from her camp.  You can make this in an evening and it is a great way to showcase all the gorgeous papers that we all love so much.  I know I have a bit of a paper addiction,  I am working through it though.
I will produce a tutorial shortly for this, so stay tuned.

Our gorgeous Cavie puppies are getting bigger each day.  Their eyes have all opened now and they are trying to walk.  So darn cute.


Till next time,
Stay Crafty,
XO Tan


Monday, 27 November 2017

Christmas Advent Calendar


Hi Crafty Friends,
Recently I shared with you one of my Advent Calendars that I've made for my family.  I have written a tutorial for this project and you can purchase this for only $3 USD. This tutorial will come with written and video step-by-step instructions.  This is the first time I've done a paid tutorial and I hope that it is ok with everyone.  Please be patient with me as I am working it all out as I go.  Let me know if you have any concerns with the tutorial and I will do what I can to help.  These calendars come together quite quickly and they are truly an heirloom piece.  If you would like the full instructions and comprehensive video tutorial, please press the PayPal button and follow the links to purchase.  I will then send you a link to the tutorial video and file.

Till next time,
Stay Crafty,
XO Tan


P.S. My gorgeous Cavalier puppies are just opening their eyes. They are just way too cute for words.


Christmas Advent Calendar $3.00 AUD